BLOG

RDM – Remote Device Management

RDM – The LED Conundrum Part 2

Let’s talk a little bit about RDM. RDM (remote device management or remote duck management) is a way to remotely change settings on DMX/RDM lighting fixtures. 

In case you missed the first installment of this series : The LED Conundrum Part 1

What you are supposed to be able to do is to plug a lighting fixture into a DMX/RDM certified network and have the lighting console identify “Oh, that’s this kind of lighting fixture. It requires this many DMX channels and is currently addressed to this DMX starting address.”  You then would be able to remotely change that and other information. 

You are supposed to be able to remotely change the mode the fixture is running in, so if it was running in RGBW and you want it to be running in some other mode,  you should be able to remotely change that. You are supposed to be able to remotely change the DMX starting address. (Can you tell that this “supposed to” treatise is leading somewhere…..) 

Yes, you are supposed to be able to remotely change other factors, too, like special effects and things within the fixture. 

When you take a company that is, let’s say, probably the largest console manufacturer in the world in the lighting industry and their DMX implementation is reportedly compliant to the standard, and you hook the fixture up to the system,  it is supposed to respond with  “Hey, hi there fixture. What are you, what are your parameters? I want to change your starting address. Let me do that.”   

That superb console manufacturer is what we use as a standards reference.  We find that some manufacturers’ fixtures just don’t show up or if they do show up, they don’t show up with all the correct information or they show up with some of the information but don’t let you change it. 

So, here are just a couple of examples of what we ran into when we hooked up a fixture to one of these consoles. 

The fixtures shows up and it says to the console “Oh, that’s an LED fixture. It’s operating in 16 bit mode, starting on address 10 and it requires 17 channels, whatever it was.”  What kind of fixture? “Unknown.” It really didn’t work properly. 

So, I went into my console library and found the fixture since I actually knew what it was and the system wasn’t telling me. It said, “it is a fixture that does this stuff” and once I pulled down its profile, it worked fine. However, it would not allow me to change it. Can’t change start address, I can’t change it from 16 bit mode to 8 bit mode, et cetera. 

With other fixtures  that I’ve tried from various manufacturers, some of the data did not show up at all. Some of them show up with random issues when you try to RDM search or flash them on a network, all kinds of problems. (Let’s not even talk about house lighting manufacturers where you put everything on a network and nothing works. Talk about a disappointment.) 

So RDM is an interesting theory, if the devices out there were truly compliant.  So RDM obviously can send the data back and forth. The problem is that a lot of people are not fully implementing it and are not sure why. 

We don’t have access to every console on the market so there always is the possibility, since I’m not a real like digital protocol wizard, that some manufacturers have certain data packets that they have designed to only send to their own stuff.  If that were the case it would seem to be a very shortsighted way of doing things. 

If there is anybody out there who knows more about this, I’d be curious to hear your take on it. I have had many  talks with that really big lighting manufacturer to find out if they have any ideas, too. In the past when I have talked to them about it they’ve said, “Nope, we’re not trying to block out anybody else’s stuff. Their product just doesn’t work properly.” 

Bottomline, for someone who needs to use RDM, it can be a nightmare. Let me give you a picture of what you could run into. 
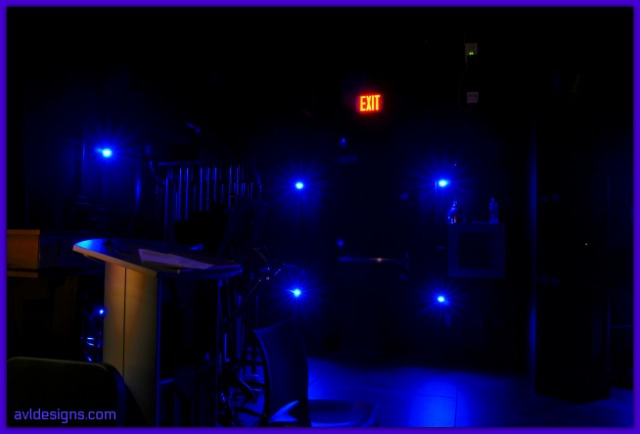
HOUSELIGHTS

Let’s just say you put up a new building and there are a hundred house lights and they are all DMX/RDM (supposedly). And the electrical contractor you hired didn’t check the firmware version, didn’t test the fixtures, didn’t do anything which he was required to do under the specifications before he put the fixtures in the ceiling. You come in and try to find the fixtures using RDM and you find that, let’s say 50% of them don’t respond. 

So the question becomes, are 50% of them defective or are they just not set up properly? Now you have to battle through that. Sometimes you have to crawl into the ceiling, which can be fun if the ceiling isn’t something you’re able to crawl into, and manually find a way to address these fixtures.   

This usually means taking them off the network and using a handheld controller, which often with a single fixture, when that controller is available from the manufacturer, will let you address their fixture. 

Sorry to say it but that is what you may have to do. Maybe their fixture isn’t even designed to work with the world of entertainment lighting and is only designed to work with their handheld plugin. Not such a good thing. Our recommendation for house lighting is to make everybody address every single fixture and test it before it ever goes into the ceiling. It is extra work for the electrical contractor, but you can see that the alternative can be a nightmare. Testing first is much less work than taking the ceiling apart later. 
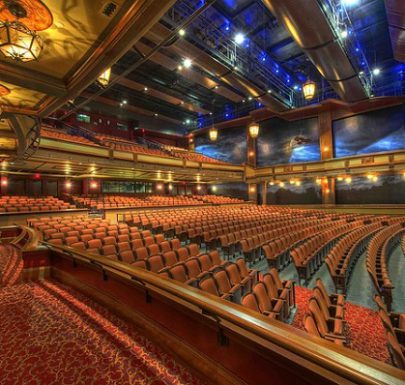
THEATER FIXTURES 

Now, let’s just say, on that same system, you’ve got say a hundred theater lights form  three manufacturers and they’re all supposed to be RDM/DMX. Now, when you plug them all into your data network and you start looking for them, only some of them show up telling you what they are and how they’re addressed.  Hopefully, some of those you can actually remotely fix. Wonderful. But then you discover that a lot of the other ones, which are from different manufacturers, tell you nothing at all.   

Now you will have to manually address those, physically get to the fixture, get to the menu, set it up and address it. Then find a library profile for it to work. 

That gets you going but in  the future, if somebody wanted to remotely change the setup because of the way they want to run a show, it is not possible. You are stuck. 

One of the key things to know is that if someone’s going to end up with a system where they cannot remotely address certain fixtures, they must be made aware of that in advance. 

One thing we recommend highly, (even though in the professional world this would seem odd), is to physically mark the original DMX address and DMX universe on every single fixture. Labeling them will tell the user that, “Oh, this fixture was on universe one channel 250 when it was originally installed, which means if I just plugged it into universe 2 it is not going to work. 

If I plug it into universe 1 and I’m trying to call it up on channel 300,  that also is not going to work.” And they’re going to have to manually readdress that fixture. Also mark on the fixture “does not RDM” so they know to set it first before use. 

Sometimes you just have to mix products and, unfortunately, the end user is left dealing with the problem, but they need to be made aware. In the public bid market, there is often the “or equal” clause. 

So when a fixture says on paper that it is RDM, you are expected to believe that. Sadly, there are times that it turns out to be completely not true. At other times, it turns out to be partially true. Some of those problems are really hard to address because they are not consistent. 

My advice: buyer beware. Test before you buy. 

We do. 

/

Copyright AVLDesignsInc 2020

Read More

Video Conferencing

Video Conferencing – STAY OFF THE SEESAW

At a time where video conferencing is way up, awareness of the need for technical quality in those online meetings has also increased.

Given a choice, many people would rather not meet online. But when there is no choice, why not reduce frustration and make it a more enjoyable experience?

Today, I simply want to address how to make online meetings sound better.

Video conferencing tips to help your online meetings sound great!

This afternoon I was sitting through yet another online conference and listening to relatively horrible audio. 

The primary factor causing the audio to be so irritating was a lack of understanding on the part of participants.  They just didn’t get how the audio component in video conferencing software actually works. When you think about it, why should they?

Here is a brief explanation of how things work in the app-based “Video Conference World” that should help. 

“One at a time?”

Video conferencing software is set up for one person to talk at a time. It is not a party line situation, like it would be in a real conference room where anyone can talk at the same time and still hear others who are talking.  

These online systems are set up to feature just one person talking at a time. 

And, of course, that is a problem. When you are in a video conference room, the tell-signs of who is about to say something are just not there.

Get off the seesaw.

Video conferencing kind of works like a seesaw. Only one person can be at the top. The other person must be at the bottom.  One person talks, the others listen.

Going back to our video meeting scenario, something happens at the in-between as the next person speaks up. At that in-between moment, each person is reduced in volume for the system to transfer from one to the other.

Video conferencing from home has its challenges. Barking dogs, background noises, doorbell unexpectedly ringing... things happen! This little dog wants to get in on the show!

To add to it, even if only one person is talking, should an unplanned noise occur in the room – rustling papers, dogs barking, etc. – the software will think someone is talking and will take the volume from the true orator and try to give it to Fido. 

Background noise is certainly one of the reasons they added a mute button to the software in the first place.  When people leave their microphones un-muted, any little noise, whether it is their own breathing, the whir of an air conditioner, or a knock at the door, makes the system think that you are taking over. The featured person who was talking suddenly is reduced in volume while the system tries to decide if you are going to continue or if you are going to stop.  

If the noise interference ceases, the software raises the level back up so that the person who was really talking can be heard again.  How often have you been in an online meeting when sound interference occurred? That is when people in the meeting will chime in “Can’t hear. Will you say that again?” We have all been there, haven’t we?

Push to Talk

The solution to this audio problem is to use your mute button a lot.  Most conferencing software has a “push to talk” mute capability built in. In the better systems, if you mute your microphone with your mouse, the space bar of your computer then becomes a push to talk button.  

When you press the space bar, it will temporarily unmute you while you talk. As soon as you let the space bar up, it will mute your microphone again. So, for the sake of all of us out here, please use the bar and mute your microphones when you are not talking. 

Friendly note to the conference administrators: each time you start a new meeting, remind the participants to mute themselves and that they can “push to talk” when they want to speak. Your meetings will flow more smoothly.

 Why is there an Echo?

Why do we hear an echo? An echo is the result of someone talking, then the sound goes to the far end (delayed) and is played back through a speaker. The speaker output at that end gets picked up by the microphone on the other end and is repeated back and forth. It is audio ping-pong. So, how do we get it to stop?

Echo cancellation software is in the app and it makes a one-on-one situation work well, but if everyone has their mics open and speaker volumes turned up loud, there are just too many sound sources for the app to always fix.

When your mic is muted you will eliminate echoing because echoes do not occur when just one person is talking.  In other words, if every meeting participant remembers to mute their mic, using the bar when it is time to speak, echoes will be almost non-existent.  

But what if you cannot unmute? If muting is not possible then reduce the volume of the loudspeaker on your device or use headphones so that extraneous sound will not be produced and picked up by the speakers.

The bottom-line is that each video conferencing system, be it Zoom, WebEx, StarLeaf, Google Meet and the like, has varying degrees of audio quality but none of them can fix errors that are created by the users.

Only you can prevent bad conferencing!

/

Copyright AVL Designs Inc 2020+

 
Read More

Stage Safety Basics For You To Put Into Action Today

Let’s have a little talk about stage safety, specifically in relation to use of any kind of stage rigging, lighting or other equipment in a theater.

Note * This is not an exhaustive study but simply a “basics list.” We find most schools don’t even have the basic level of safety procedures in place.

Stage safety basics for all theaters including high school auditoriums. #tips

When no one is monitoring the stage systems, accidents could easily happen and most of them are avoidable. As we visit schools to review their systems, we often discover unsafe conditions which have not been addressed and that no documentation has been created to let anyone using the stage know that a dangerous situation exists. That is never a good idea.

Start With Stage Changeovers

There should be procedures in place, with sign-offs, indicating that people have checked the status of their contribution to the stage before a show starts. People should not be randomly building sets, attaching lights, adding microphone cables, lighting cables and the like without certifying that they have first done a proper, coordinated safety check. That check needs to indicate nothing is snagging, everything is attached with proper load-rated hardware and that everything is in balance. This must be a written document, accessible to all on stage. It is imperative that anyone using the stage review this safety checklist first, prior to use.

Failing to maintain this documentation is like loaning a car to someone without telling them the brakes don’t really work so don’t stop suddenly. “Oh, and the gas gauge is broken and I’m pretty sure that the headlights don’t work.”

Stage Checklist

There should also be a form that gets logged and signed off at the end of a performance or rehearsal that indicates the condition of all stage systems.

A sample basic checklist:

  1. All rope locks are engaged.
  2. All of the battens are properly counterbalanced.
  3. All battens are free from any tangled wiring or items that could impact adjacent battens.
  4. All lighting circuits are plugged and checked.
  5. All fixtures that are assigned to the show plot still work.
  6. All fixtures have safety cables.
  7. No defective wiring was found.
  8. There are no stage weights or anything in the locking rail that could cause problems.
  9. There are no trip hazards on stage
  10. Etc…… There are a multitude of things that should be on a sign off sheet depending on the show, venue, and special conditions. 

Where a checklist alone does not suffice to indicate a safety hazard, you may also need to rope off, lock, or mark safety hazards that can’t be corrected immediately.

Safety Procedural Manual

There should be a Safety Procedural Manual for every stage. Some really good ones are available online for review. Maintaining stage safety protocols is not just a matter of making a checklist of two or three things. There are pages of checklists items that should be followed every time you change anything for show, or plan and build a show.

Define Your Team

You should also make a list of authorized personnel. Not just anybody should be able to go up on stage and perform work or run rigging systems.

If you can’t do the math to figure out the load on a batten, then you shouldn’t be allowed to touch it.

If you can’t walk up to an arbor and by a quick visual and manual inspection of the operating lines determine whether the set is in-balance or out of balance, then you shouldn’t be opening a rope lock at all.

These procedures should be in the training manual. People who have been trained should be certified by the school.  Letting just anybody do anything on a stage is a recipe for trouble.


Let’s look at  an example of what can happen.

You walk in and need a curtain that is flown out  to be  moved down towards the stage. The person who used the stage last, for some bizarre reason removed a bunch of counterweights from the curtain set arbor after it was up. That arbor is light and the curtain is heavy. You don’t know enough to recognize what has happened, so you go ahead and release the rope lock causing the curtain to come crashing down towards the stage.

There are a couple of possible outcomes this un-safe scenario may produce. In the case of a stage curtain, when some of the weight of the curtain  lands on the stage, it slows down. If you’re  lucky it stops before the batten it’s attached to  hits anybody in the head.  But, sadly, things could go the another way and it will injure somebody.

Lack of safety procedures and not insisting upon sign-offs puts people in physical jeopardy. Sign-offs basically say “Hey, show’s over. I checked all of the sets, everything’s in balance [i.e. safe] so that when you release the rope lock, nothing will start moving much by itself.” Insisting on official sign-offs makes it safer for non-skilled people to use the stage.

It is still not a good idea to have non-skilled people working the stage but, at least, it is safer with a checklist.

What if there is an electric cable that is frayed, a light was flickering, or the sound system was making a humming noise that it never made before?  Log It. There must be a reporting procedure so that when anything like that is found, it will be logged and communicated in writing to someone who can check into maintenance.

Note: Procedural manuals are also needed but that is another topic. How sets are  built, use of paints, special effects, power tools, fall protection, use of ladders, electrical safety, issues with strobes, lasers, etc…. will need to be in your procedural  manual.

Here is a well-thought-out manual by Southern Oregon University, available for you to read (not plagiarize): Sample Stage Safety Manual

Stage Rigging Inspections

You must have inspections on a regular basis by qualified professionals. These inspections will identify where there are issues and other problems that a general checklist cannot address. ESTA and ANSI standards require inspections of counterweight manual and motorized rigging that need to be performed annually and or biannually. On motorized rigging and stage lifts, the inspectors have to be versed in the specific system, general knowledge does not suffice.

If these inspections are not being done, you’ve now left your people “using a car with bad brakes.”

/


Copyright AVLDesignsInc 2020

Read More

Auditorium Acoustic Options

In the past, auditoriums were generally purpose-built. Opera houses were designed for opera. Orchestras often share the opera house by adding a stage shell that would aid the orchestra acoustically.  

Lecture halls were designed for speech. Movie theaters were designed for sound reinforced by audio from loudspeakers.  

Churches were designed for various styles of music and use. Some spaces were built around the required characteristics of a large pipe organ.  As liturgical spaces are being repurposed for contemporary music and changing congregations, the results are often not very good.

Multipurpose auditoriums were never really multipurpose.

They were a middle of the road compromise.

When preparing to design a space from an acoustical point of view, the first question that has to be answered is:

What type of performances and uses should it accommodate?

Next Question:

Can I target a style or do I need variable acoustics?

Generalized Examples:

  • Unaided speech requires a quiet room, lower reverberation time and strong early reflections.
  • Orchestral requires a  longer reverb time, extended bass response, and a diffuse room response.
  • Contemporary music driven by sound reinforcement requires a completely different room character. In order to allow the sound system to control the experience, the room has to be subdued.

Personal Experience:

Dead Room

Live music can be disappointing in the wrong environment. I remember once I was working with a jazz artist and the auditorium we were booked in was entirely covered in thick fiberglass wall panels. It was dead as a doornail acoustically.

Even when using reverb effects, the room still sounded wrong. The reverb was coming from the PA and the stage monitors, not the room. The side and rear walls were absorbing everything, not adding anything to the sound. Not a great experience.

Overly Live Room

I also remember hearing a favorite artist (Jazz/Bluegrass) in an opera hall. The room was so live it was totally muddled. The sound system could not correct for the overly reverberant room.

How About a Variable Room?

If you build a room with no acoustic variability, as and audience member or performer you are stuck with what you have.

Acoustical Variability to some degree can be accomplished with wall covering drop curtains, rotating walls with various materials, and other options. Physical options can be costly and they can take significant manpower to change for each event type.

Electronic Acoustic Architecture

Most people are familiar with movie theater surround sound. THX, Dolby, Dolby Atmos etc…. These systems create spatial locations for sound sources using a multitude of speakers, each receiving specific information to simulate where the sound would be coming from, or to extend the “feel” of an environment.

While these systems are great for movies, they aren’t deigned to work  with a live musical source.

Fortunately recent advances in technology have made it possible to go beyond surround sound into fully simulated live acoustic environments. Imagine you are performing in a relatively plain room with a medium reverberation time and not a lot of lateral energy. Walking the seating area, you find that there are dead spots and changes in frequency balance. Your ensemble sounds a bit thin and lifeless.

Like A Concert Hall

What you want for your ensemble is a much larger room with elegantly tailored wood and brick surfaces, diffusive in nature like a concert hall. Features like these are what makes concert halls concert halls.

Imagine, now, an electronic acoustic system that can create the sound of the room that you are not in.

This Is How Electronic Enhancement Works:

  • A series of prearranged microphones pick up the natural sound of the ensemble, organ etc… from a suitable distance so the sound is well mixed. This sound is then processed by a complex computer algorithm that simulates how the sound would behave if it was occurring in a simulated room. This sound is then precisely distributed and tuned to small loudspeakers located to simulate the room you want to mimic.
  • Room tunings and character can be changed at will. To the audience, it is entirely natural.  It just sounds as if they are in a different room.
  • When the orchestra takes the stage, the room gets larger and has added bass extension. The choral group gets a longer reverb time with added midrange clarity.  For speech, the system switches to a voice lift mode and can improve intelligibility.
  • All of this is controlled by  simple presets: Choral, Organ, Speech etc…

In order for electronic acoustics to work, the ROOM itself needs to be designed carefully from an ACOUSTIC standpoint, but in a different fashion.

Discrete echo has to be controlled. The enhancement system works with the room acoustics, but cannot cancel out physical acoustic defects.

Successful implementation of electronic acoustics requires coordination of the system elements with lighting, ceilings, walls, HVAC, plumbing and other elements throughout the design process. HVAC noise has to be very carefully controlled.  Led lighting (much of which is now fan cooled) has to be chosen and placed very carefully relative to microphone locations.

https://www.youtube.com/watch?v=Te5lPxzVR4E

The Physical acoustic conditions have to be designed to work with the system. This is not a sound system, it is an acoustic system and placement of all elements are critical relative to the room in which it is employed.

The results are well worth the effort. Performances are enhanced and audiences experience an enveloping detailed sound quality in auditoriums that were previously not.

Copyright AVLDesignsInc 2021+

/


Read More

Sound In Schools – Why It’s So Bad

So, today we were at a school that wanted a review of all their technical systems: stage rigging, lighting, audio, video, curtains – everything.

As usual, the first thing that we found was unsafe stage rigging as well as unsafe stage practices such as building sets, suspending sets, etc. [Which is the subject of another little article: Sound in Schools Part 2]

The next discovery was lack of skills in knowing how to do lighting.

But the number one thing that came up, and it almost always does, is bad audio. Years ago someone wrote a book with the title “If Bad Sound Were Fatal, Audio Would Be The Leading Cause Of Death” [authors Don & Carolyn Davis] Yes, bad sound is a universal problem and, truly, the number one complaint from schools for their theater productions, as well as for just day-to-day meetings, lectures, etc.  No one can seem to get audio to work. So, why is that?

Audio is not a Technical Skill

We were trying to explain to them why it is so difficult to get audio to work. And the first misconception that they had, as well as everyone else seems to have, is that audio is a technical skill. Audio is not a technical skill. Audio is a musical skill and, unless you have musical capabilities, you are never going to successfully do audio.

What do we mean by “musical capabilities?”  It means that running audio for any kind of function is similar to learning how to play a musical instrument. On an instrument if you play something in the wrong key everybody knows. It is immediately apparent. They don’t look at you and go “gee, I wonder what is going on with that instrument?” They just go “He’s wrong. Let’s fire that guy.”

In audio, when people get bad results whether its poor tone quality, muddy sound, feedback, screeching – take your pick of aberrations that people get –  it is all bad sound. When people look at how to get this to stop, they think somehow that there is a magic fix to it. Usually, they think it means buying new gear. Wrong.

People assume that in all circumstances getting new gear will fix all audio regardless of who is using a mic, how they are using a mic, what their voice sounds like, what else is going on in the room, etc. That simply is not the case.

Another thing we hear a lot is directors telling their sound people to “get it set” and just leave it alone. Sure, if everything else doesn’t change at all ever. That scenario hardly ever happens.

So, the first misconception is that the fix is a technical skill. It is NOT. It is a musical skill! So that means the person doing audio should be able to play an instrument. They need to be constantly staying top of the changes happening on the source end, level, EQ, etc….on the fly.

That person has to be able to identify frequencies by octave band, at minimum. Third octave band would be even better so that when they hear something they will recognize “ oh, that is this frequency that is out of control. I need to fix that.” 

So, that is the first set of skills. Develop self-ear-training. Ear training is best learned from a musical perspective. You can teach it to a technical person who is non-musical but it is a lot more difficult.

So you get this person, now, and you get him/her to the point where they actually have an idea of what certain frequencies sound like. That way when someone is performing and the sound person hears something they don’t like, they can say “oh, that is 250hz, if I can take some of that out they will stop sounding so “chesty” and the audio quality will be better.”  Or “that squeal I am hearing is 8khz. I can pull the filter out and get rid of the feedback problem.” So they’ve got that skill, that’s great. You are on your way.

That is one microphone, one person. [More to come in our next installment: Sound in Schools Part 2! ]

/
 

Copyright AVL DESIGNS INC. 2021+

Read More

Sound In Schools – part 2 – You are part of the band!

In case you missed it=> Sound in Schools: part one

So, you have one mic sounding good. Now let’s start working with multiple microphones, multiple instruments. The nitty gritty of bad audio, if we  were to put it in a nutshell, is  the notion that if you get each channel sounding good by itself and then turn it all up, it will all sound great together.  Based on that premise, if you want somebody to sound more in front of someone else, you just turn them up, right?  Not exactly. Why not?  Because that is not how the human ear operates.

Discovering why sound in school auditoriums is often so bad, and how to fix it! #sound #AVTweeps #audio #performingarts #Highschool

Your ear can only discriminate a certain number of things at any given time. Try this for an example:  play a track of a bass player that sounds good, full and crisp. Now turn on a fan in the room. Bass definition drops off and, oddly enough, it sounds like there is no bottom-end. If, instead of a fan the sound interference was cymbals, it would be even worse. Multiple “anythings” have similar issues. Sounds mask each other.  As the engineer, you have to decide how to deal with that and make music out of it.

So, let’s just take a simple task:  two vocalists as opposed to just one.

Put two people up there and let’s say they have kind of similar voices and you have a hard time figuring out who’s who. When you listened to each voice individually they sounded pretty good – and then when you put them together it is just kind of two-dimensional.

You can’t really tell who’s who when they are singing at the same time.  Now, if they are in a duet or singing parts and they are breaking apart, obviously that changes. But when they are singing together, you’re not really hearing the voices independently.

One of the things people will do, if they are mixing on a sound system that is stereo, is to pan one person to left and the other person to right. And then, if you are sitting in the middle of the room, that really separates them.

In live sound, however, if you are sitting on the right or the left side of the room you won’t hear the other person very well at all. So that approach  is not a viable fix  unless your sound system is a type that hardly any average school has, where the left and right systems completely overlap the entire room and provide true stereo in all seats. [We can talk about why that is complicated to do in a different segment at some point.]

Most live sound is dual mono by default. Separation in the mix is done by other means.

So, let’s get back to the two microphones. We really need to mix them in mono because we need to be sure everybody in the room hears both singers, but we want them to sound distinct. So what should we do? We will take some frequencies out of one mic that we leave in the other mic to make them stand apart sonically.

Let’s say there is a male voice and a female voice. In this instance, the goal is for the male voice to stand out in the low frequency ranges but the female voice has some low frequency content. To make that work, we will pull some low frequencies out of the female voice which will separate the two.

Now, if we then listen to the female when she is singing just her part, we have to bring those low frequencies back in for a while to make her voice sound the way it should as a soloist. But when they go back to singing in unison, in the duet sections, we will have to pull her voice frequencies out to get the whole thing to work from that perspective.

So, it’s a constant movement, like playing an instrument.

You are not leaving things alone. The keyboard player doesn’t just play an F chord and that’s it. When they’ve got to play a B flat cord, they change to B flat. Channel equalization has to change in various songs and parts of songs. In essence, you are part of the band.

/
 

Copyright AVL DESIGNS INC. 2021+


Did you miss part one? Catch up here>>> Sound in Schools part 1 Copyright AVL Designs Inc 2020+

Read More